
Start out by designing your part in a CAD or drawing program. I like to put cross-hairs in any hole that needs to be drilled so I can align the drill bit to it more easily. It may also be a good idea to make note of what kind of hole you need to drill, especially if you mean to tap threads into it.
Once you are sure your part design is ready, print it out.
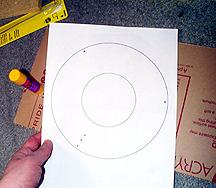
Here we see the plan for the big blue base I made for Elma Beaucoups. Behind it is a raw piece of acrylic sheet (the victim) and a glue stick.
For gluing plans to plastics, I prefer the Prang brand Purple Glue Stick ("Dries Clear!") Other kinds don't hold as well and will pop off, especially when you're trying to saw the plastic.
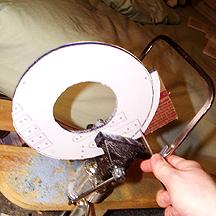
Once you have glued the plan to the plastic, you're ready to saw the part out. Here's where a hobby vise comes in real handy, especially when you're using one hand to hold your camera.
The really handy thing about coping saws is that you can detach the blade and put it through a hole inside the sheet to saw out a bigger hole without going through from the outside. Such holes will make your robot lighter, and look cool.
Saw close to the line, but a little bit outside of the part. We'll take the rest off with a file for more precision.
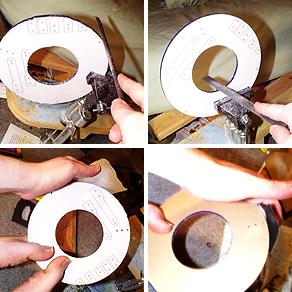
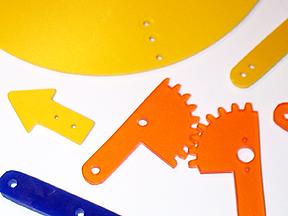
Coping saws are not precision tools. See those jagged, funky edges in the top left photo? Now it's time to file file file sand sand sand buff buff buff. Sand file buff. Buff file sand. File! File! File! Sand. Buff. Sand. Sand. Sand. Sand.
Don't go too crazy, though, trying to get a fine, sparkling finish until you have drilled all your holes and are sure the part fits and works right.
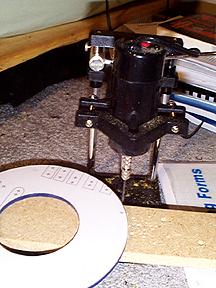
Drill your holes. It helps to use a sharp object like a nail to put a little indentation at the center. This helps the drill bit find center and stay there until it penetrates the surface of the plastic.

After cutting and filing your part, & drilling and tapping your holes, you should try the part out informally to make sure it fits properly. If it does, you're ready to take the protective paper off the plastic. If you glued your plan directly onto the plastic, hold it under the sink until the glue dissolves and you can pull the paper off.
Wash off the remaining glue and voila! You have a precision robotic part.
With some effort, more research, a lot of planning, and a ton of patience, you'll be amazed at the complexity of parts which can be made this way.